
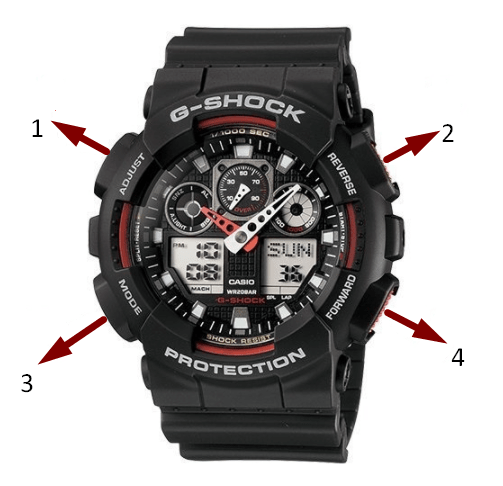
On most four-button analog-digital G-Shocks, return to Timekeeping Mode, hold ADJUST until the city code flashes, use MODE to move through the fields, change values with the two right-side buttons, and press ADJUST to save.
First: identify which instructions your watch needs
Turn the watch over and look around the center of the case back. The model name may read GA-100 or GA-2100, but the boxed number—such as 5081 or 5611—selects the correct manual.
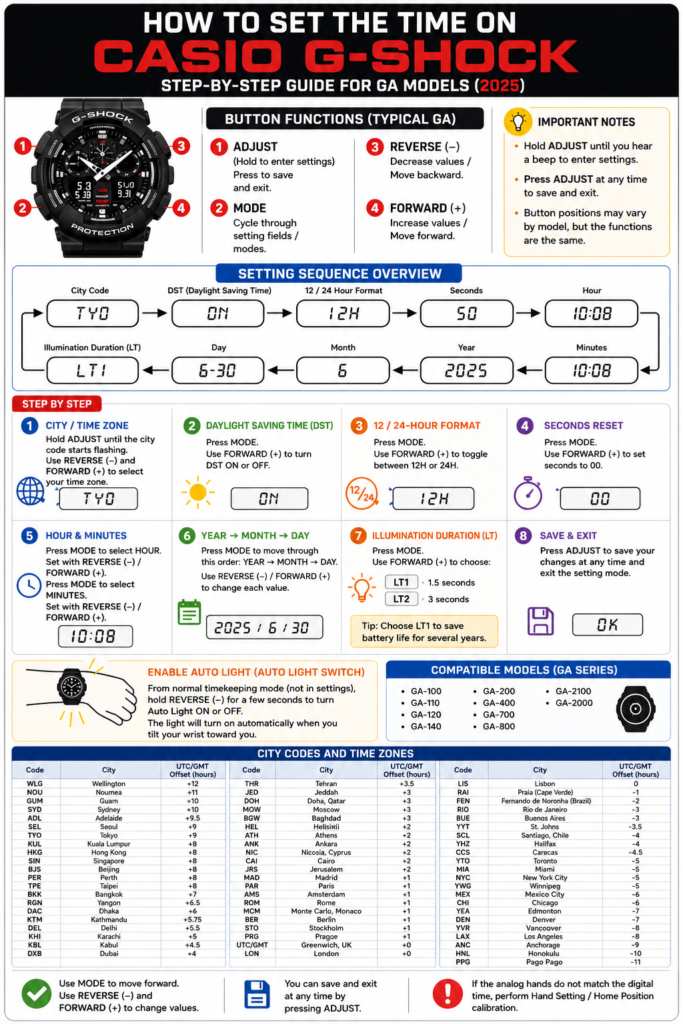
Fast routing: use the procedure below for a conventional four-button GA-style analog-digital watch. If yours has a crown, a full-screen menu, GPS/radio control, or phone connection, jump to Choose the right route for your G-Shock.
The clear four-button method
Press MODE repeatedly until the normal day/date and current-time screen appears. Do not start from World Time, Stopwatch, Timer, or Alarm mode.
Hold ADJUST for roughly two to three seconds. Release when a city code, SET, or another setting starts flashing. Continuing to hold the button can open a different function on some modules.
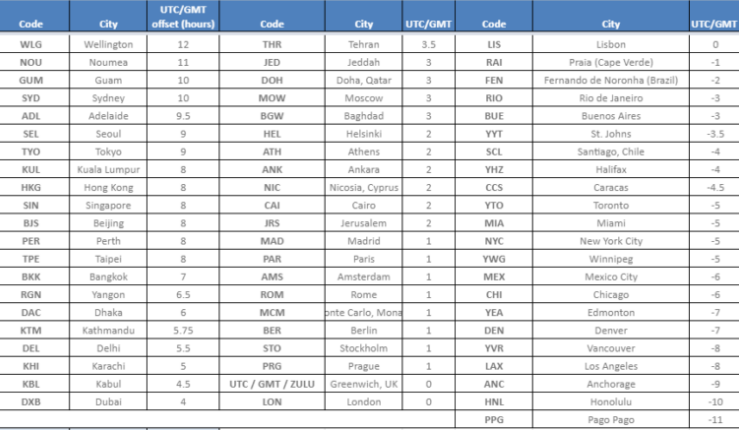
Use the right-side buttons to choose the city representing your time zone. Home City is the foundation for World Time and DST, so correct it before changing hours or minutes.
Press MODE once to reach DST on many GA modules. Select OFF for standard time or ON for daylight saving time. Use AUTO only when your module supports automatic switching for the selected city.
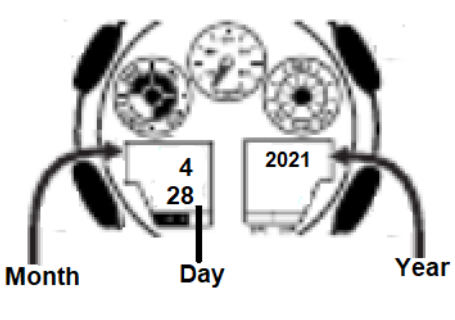
Keep pressing MODE to reach 12/24-hour format, seconds, hour, minute, year, month and day. Change the flashing field with the right-side buttons. The order can include extra settings such as button tone or illumination.
Press ADJUST to exit. Check the day/date, AM/PM indicator in 12-hour mode, and whether the analog hands agree with the digital display.

Fix the symptom instead of resetting everything
| What you see | Most likely cause | What to do |
|---|---|---|
| Time is exactly one hour early or late | DST is wrong | Keep the Home City; toggle DST ON/OFF. |
| Minutes are right but the hour is wrong | Wrong Home City or 12-hour AM/PM | Check city code, then the P indicator. |
| Digital time is correct, hands are wrong | Hand alignment/home position | Run the module-specific Hand Alignment procedure; do not offset the digital time. |
| You changed a city but Home Time did not change | You were in World Time Mode | Return to Timekeeping Mode before holding ADJUST. |
| The setting screen closes by itself | No input for a few minutes | Re-enter settings and continue without long pauses. |
| Time changes back after you set it | Phone, radio or GPS synchronization | Correct Home City/DST or sync settings instead of fighting the automatic source. |
When the analog hands do not match the display
This is a calibration problem, not a time-setting problem. Look in the exact module manual for Hand Alignment, Home Position, or Hand Setting. The entry shortcut varies between modules; using the GA-100 shortcut on a GA-2100 or connected model can open the wrong screen. Align the hands to the reference position specified by Casio, save, and then recheck the normal display.
Choose the right route for your G-Shock
The method above is written around this control style. Casio also provides dedicated videos for time/date, DST, World Time and hand position.
The screen sequence and hand correction are model-specific, even though the watch has four buttons.
Many non-Bluetooth GA-2100 watches use module 5611. Confirm the boxed module number before following that guide.
For GA-B2100, GBD-200 and other connected models, correct the phone time and Home City in CASIO WATCHES, then synchronize.
Set Home City and DST correctly, then perform the reception procedure shown in the module manual.
Do not force the four-button sequence. Crown position and menu navigation differ substantially.
Watch the GA-style procedure
This video is useful as a visual example, but match the controls to your module before copying the sequence.
Thirty-second final check
- Home City matches your time zone.
- DST reflects the current local rule.
- 12/24-hour format and AM/PM are correct.
- Date is set, so the weekday calculates correctly.
- Analog hands and digital display agree.
- Connected or radio-controlled models no longer overwrite the correction.